I think I came across Automate Asia in the local news. So when I needed to make my house “smarter”, I decided to engage their services.
Note that this is not a sponsored post, I paid for their services. Just wanted to do a shout out to Mike and the team at Automate Asia for the awesome service with the answers to my noob questions.
After playing around with Z-Wave devices, I realized it is so fragmented. If you bought a Z-Wave hub from SmartThings, Vera or Fibaro from US or even Hong Kong, you can’t use it with Z-Wave devices bought in Singapore beause of mismatch frequency.
EU is using 868.4MHz while US is using 908.4MHz. Australia, New Zealand, Brazil and Hong Kong are using 921.4MHz. Singapore follows EU and hence we are using 868.4MHz.
That is the reason why I can’t use my SmartThings Hub which I bought from Amazon and I have to get a new hub which supports local frequency.
Mike recommended me getting the Fibaro Home Centre 2 (S$980), but it was out of my budget, so I settled with the Fibaro Home Center Lite (S$490) instead.
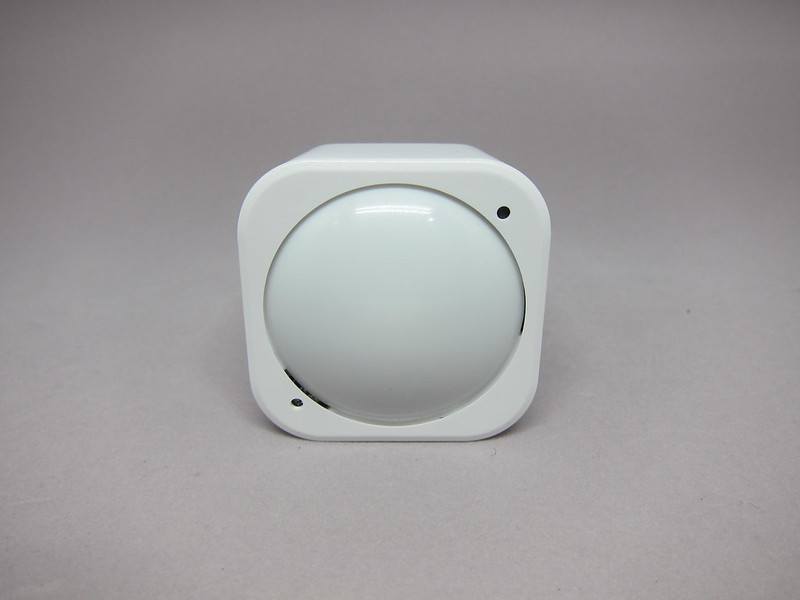
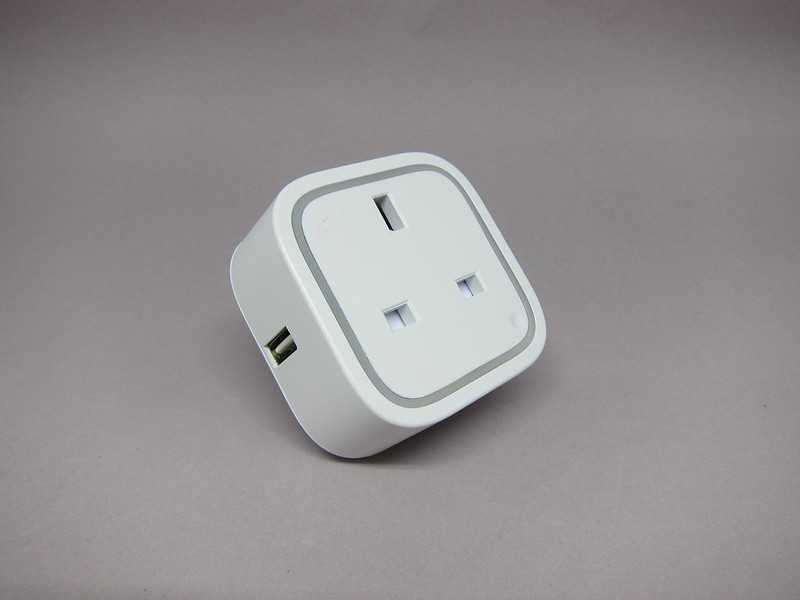
So happen that Mike has the Fibaro Starter Kit in stock and hence I ended by buying that. The Fibaro Starter Kit which cost S$750, consist of Fibaro Home Center Lite, Wall Plug, Motion Sensor, Door/Window Sensor, Flood Sensor and Smoke Sensor.
Changing Light Switches
I also bought MCO Home Touch Switches to replace all my existing light switches so that they can be controlled by Fibaro Home Center.
I bought three MCO Touch Panel (1 Gang MH-S411) at S$130 each, three MCO Touch Panel (2 Gang MH-S312) at S$160 each and three MCO Touch Panel (4 Gang MH-S314) at S$190.00 each. The only light switch I didn’t change is my bomb shelter one.
")
")
")
Installation is done by Mike’s electrical contractor named James. Installation is charged at S$30 per point and an additional S$30 per point if wires are needed to be pulled to the switch.
If it is your first time doing smart home, most probably you will need to pull another wire to the switch because most houses have only two wires which gives you the state on or off. A third wire is needed to always power the switch. Because it is a smart home, the switch needs to be always powered on. And the actual state of the light will depends on the switch controller. So the installation alone cost me 9 * S$60 = S$540.
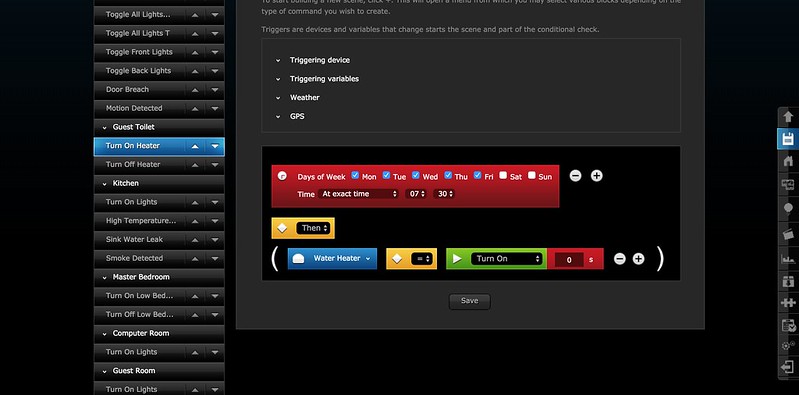
Fibaro Home Center Lite


The Fibaro web UI is pretty ok but the learning curve is pretty steep as compared to SmartThings but of course you can do much more stuff with Fibaro Home Center.


I am not a fan of Fibaro mobile app UI because it is kinda ugly and the UX is horrible. In this area, SmartThings app excels!


Siri/Amazon Echo
I managed to integrate Fibaro Home Center Lite with Siri and Amazon Echo. And hence I can use Amazon Echo or Siri to off and on my lights as shown in the video below.
Siri integration is done by homebridge and homebridge-Fibaro-HC2 running on my Pine A64.
On your iPhone or iPad, you will need a Homekit App and I recommend MyTouchHome for S$2.98.
Amazon Echo integration is done by habridge running also on my Pine A64, you will just need to enter your Fibaro Home Center on/off URL of your light which looks like
http://username:password@192.168.1.1/api/callAction?deviceID=[id]&name=turnOnand
http://username:password@192.168.1.1/api/callAction?deviceID=[id]&name=turnOffConclusion
In total, I spent S$2,730 on my smart home hobby which I think is expensive. I guess that is the price to pay to be a first mover.
- Fibaro Starter Kit – S$750
- 3x MCO Touch Panel 1 Gang (MH-S411) – S$390 (S$130/each)
- 3x MCO Touch Panel 2 Gang (MH-S312) – S$480 (S$160/each)
- 3x MCO Touch Panel 4 Gang (MH-S314) – S$570 (S$190/each)
- Installation 9 Points with Cable Pulling – S$540 (S$60/point)
Smart Home will probably be the trend for the next few years and I am glad I did it at the start!
wow that is a little costly, but it almost always is for early adopters.
power consumption in the long run? is it going to be significant?
That is my next Smart Home gadget, mesaure power consumption at the Circuit Breaker Level.
So what’s going to happen to your SmartThings Hub?
I am still using it because I got US Z-Wave devices. All my window sensors, flood sensors are all US based, so I am using both. I find Push notification and armed/unarmed is more reliable on SmartThings.
Yeap that!
Hi, came across your stuff and am interested but I have a question in mind, knowing the difference in freq which you’ve mentioned, currently I am using RM2 Pro, so I still need smartthings to run home automation via Amazon echo?
If our RM2 Pro has API to on/off a device, you can use it with https://github.com/bwssytems/ha-bridge
Thanks for taking time to reply. What confuses me is using “smartthings” and/or a “raspberry pi”. If I already have the RM2 pro, so I need smartthings? Or raspberry pi? Or both, in order to make Amazon echo work in “controlling” the RM2 pro
You need raspberry pi to run the platform to emulate the devices on RM2 Pro for Amazon Echo to detect. If you are not tech savvy, I suggest stick to SmartThings, but since your RM2 Pro is already a primary controller, I think you need to make your SmartThings as a secondary controller.
Thank you. I think smartthings do not have integrated IR… unlike RM pro. I may consider a secondary controller such as smartthings or fibaro for my other stuffs 🙂 thank you for your time.
Hi,
Am planning my devices and setup for my new place. I have ordered the echo + dots and the tado. I was actually thinking of using the smarthings as my hub as the other solutions are all pretty expensive.
I assume you got this fibaro one is because you have devices that are on different frequency.
If i am gonna plan my devices, I should get all the smart devices from the same country right? I will be getting a smartthings hub and the philips hue when my renovations start. So my hub will be smartthings which is controlled by echo.
Do you see anything wrong with my setup?
Yeap, you should get all the devices for the same country because Z-Wave frequency is different from each country. In my house, I am using two frequency, US one for SmartThings and SG one for Fibaro. I am slowly phasing out my SmartThings because Fibaro is much better.
Thanks for this. Really helps. How’s the MCO switches working out for you so far? I’m thinking of getting some to try. My goal is to have lighting control via Amazon Echo Dot. But also with some room for additional control for media, security etc in future. Looks likely Fibaro or Smarthingsare are good choices. The switches would work better considering I will have downlights in my new place and none of the smart bulbs options are viable. Wink has a good solution for me but they don’t have anything for our voltage. Is there alot of work to pull the neutral wire? Appreciate if you can share some tips. Thanks in advance!
It is working well for me except for two of my furthest switches that looses connection sometimes and I have to remove and re-add it back (reconfiguration doesn’t work). Kinda irritating. Other than that it is ok.
I would say go for Fibaro HomeCenter 2 or Vera Plus. Skip SmartThings. It is too basic.
Don’t go for Fibaro HomeCenter Lite (like me) because works but if you want to upgrade it, it is a pain in the ass to re-add all the devices. So go for the best from the start.
After 6 to 7 months of this smart-home post do you think Fibaro is still the best or is there any other better competitor?
Also will Fibaro work with BroadLink TC2 smart switch?
I think both Fibaro and Vera (I heard, never use it before) is good. I am not too sure about BroadLink devices, never use them before.
Hi Lester, I have a fibaro lite but recently experienced lights that can’t be turned off. Do u have your electrician James contact number so that I can contact him for troubleshoot since he is more experienced than if I just call normal electrician. Thanks in advance , Kenneth
I don’t have his direct contact, I engage Automate.Asia services and James was the one that came down. Maybe drop Automate.Asia an email?
Did you try un-pairing and re-pairing the lights with Fibaro HCL again? The problem often lies in the z-wave device itself
Thanks , will call them. I haven’t try to un pairing and repairing so maybe it is due to this issue.
Fully agreed on the excellent services & patience rendered by Mike, Edwin, James & Vincent.
hi, have you considered Xiaomi smarthome before? Prices look good.
May I know if I need programming knowledge to use Homebridge?
Yeap you will need some