Adobe Photoshop CS6 is included in all the Adobe CS6 suites and is available in Singapore since the end of April 2012. Prices are as follows (excluding taxes)
- Photoshop CS6 (Upgrade): S$302
- Photoshop CS6 (Full): S$1,057
- CS6 Master Collection: S$3,924
- CS6 Design & Web Premium: S$2,868
- CS6 Design Standard: S$1,962
- CS6 Production Premium: S$2,868
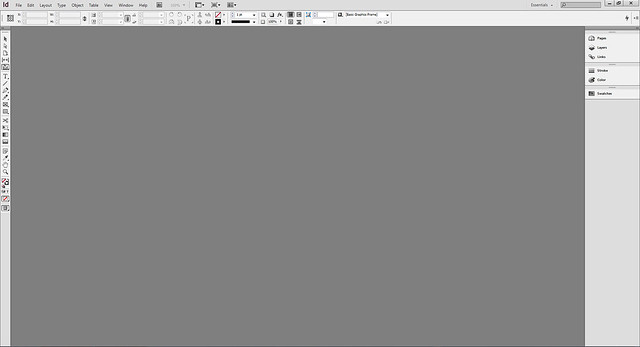
Interface Color
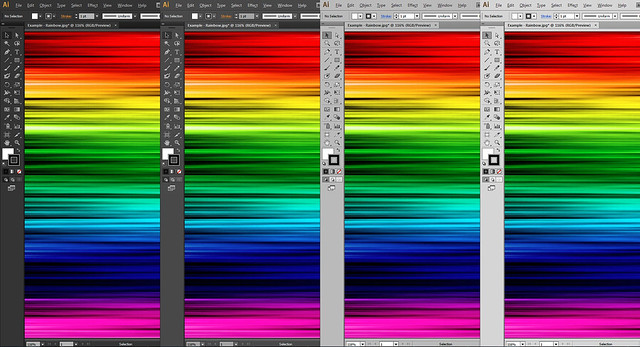
There is a major change in Photoshop CS6’s user interface color: 4 different shades of grey schemes are implemented. This is individual preference. The color will not affect how your works look like across different schemes.


Menu: Edit > Preferences > Interface > Color Theme
Keyboard shortcuts:
- To Darken: Ctrl + F1
- To Lighten: Ctrl + F2
Tooltip
Web or UI designers would probably find Info panel useful, checking dimensions of icons they drew. The enhancement in CS6 provides a quick information tooltip showing: width and height, distance the object has been shifted or the angle of rotation when you hold down your marquee tool, move or rotate an object respectively.

You can change the unit of measurements shown through:
Menu: Edit > Preferences > Units & Rulers > Rulers
Info panel is not obsolete. It shows you more information about the colors you’ve picked, x-y coordinates and files sizes.
Layer Classification & Searching
Layers after layers of work can now be sort out with the introduction of this new feature. You can display the layers according to: Kind, Name, Effect, Mode, Attributes and Color.

Within Kind sorting, you can choose to display layers with only or in multiple combinations of: Pixel layers, Adjustment layers, Type layers, Shape layers and Smart Objects layers. While in Mode sorting, you can choose to display layers with selected blending modes: Normal, Dissolve, Darken, Multiply and so on.
This speeds up the hassle of scrolling through tons of layers for DI artists.
Viewing Multiple Documents
Photoshop CS4 has a great deal to open multiple documents in tab form. But sometimes, you just want to lay your works side by side. With a click of the mouse, you can tile your documents in All Vertical and All Horizontal, 2-up Vertical and Horizontal, 3-up Vertical, Horizontal and Stacked, 4-up, 6-up, or Consolidate All To Tabs.

Menu: Window > Arrange
This feature has been there all the while, but with lesser arrangement choices. In CS6, icons are introduced to further explain how panels are arranged. This definitely makes understanding clearer and easier to use.
Crop Tool
Cropping is a little different this time. You can now crop images with several assisting guidelines such as: Rules of Thirds, Grid, Grid, Diagonal, Triangle, Golden Ratio and Golden Spiral.

In the past Photoshop versions, the image we are cropping is often fixed and unmovable in the background. The only thing we can do is either to redraw, scale or rotate the cropping boundary. In CS6, once the cropping boundary is defined, what you’re shifting within is the image. You can move, rotate and undo movements within the cropping boundary. You’ll have to hands on to experience the difference.

Perspective crop has been taken out from cropping option. In replacement, we have Straighten.
What Straighten does is to allow user to determine how much angle an image has been tilted by drawing a level line. Then, CS6 will rotate the canvas to the defined level before you crop. This somehow works very differently from Perspective option: Perspective option do comes with a little distortion when you crop an image, but Straighten option only rotate the canvas to a level. The effect achieved can be quite different.


Blur Filters
3 additional blur filters are added to the family: Field Blur, Iris Blur and Tilt Shift. These 3 blur filters provides more flexibilities to the older ones.
Field Blur: Most flexible blur filter among the three. You can mark different points on an image to define areas you want or don’t want to blur. Default blur value is 15px, set 0px for no blur. Exceptionally useful for product or modelling shots where you can freely define what to focus, very natural.

Iris Blur: Cylindrical shaped tilt shift. Adjustable coordinates to turn an oval to almost a cuboid tilt shift. Can define more than 1 Iris Blur area in a single filter.

Tilt Shift: Horizontal tilt shift, rotatable to vertical. Can define more than 1 Tilt Shift area in a single filter.

One type of blur filter is not enough? You may combine these 3 blur filters by checking the boxes on their right.
Type Tool
Not much changes to the Type tool. You can now place dummy text, Lorem Ipsum, in CS6 text box.

Menu: Type > Paste Lorem Ipsum
3D
3D has been a tool option in CS5. In CS6, 3D has shifted up to the menu. I’ve tried very basic rendering of 3D text. This can also be applied to shapes. You may adjust the 3D element by adjusting the 3D camera views or x-y-z coordinates before rendering.

Conclusion
Photoshop CS6 has introduced several changes to the users. Some changes are drastic, most changes keep up to how users use Photoshop to accomplish their creative tasks. Compared to 10 years ago, Photoshop might only be a digital imaging and editiing software. Today, people use Photoshop for many other purposes.

like this one! yea. Lester. This CS6 seems better except hardware requirements. 🙂