Western Digital My Passport Wireless is the first wireless storage from Western Digital. It was launched on the 29th October 2014 in Singapore.
There are three sizes available, 500GB, 1TB and 2TB. However in Singapore, only the 1TB and 2TB are available. The 1TB is retailing for S$299 and the 2TB is retailing for S$399.
Beside the capacity difference, the thickness of the drive also differs. The 1TB has a thickness of 24.4mm while the 2TB has a thickness of 29.8mm. That is a difference of 5.4mm. Personally, I am ok with the 2TB thickness, but some of my fellow tech bloggers find it too thick.
For this review, I bought the 2TB variant at a media discount. If not for the media discount, I will probably get the 1TB variant from Amazon (US$168.47 ~= S$220) instead because it is much cheaper and it ships for free to Singapore under the free Amazon’s AmazonGlobal Saver Shipping.
 - Box Front")
 - Box Back")
 - Box")
 - Box Contents")
The default packaging comes with the wireless drive, quick starter guide, warranty information, 2A USB charger, USB 3.0 cable and two charging adapters(one for UK/Hong Kong/Singapore and one for Australia/New Zealand).
 - Charger")
 - Charger")
 - USB 3.0 Cable")
 - Top")
At the top of the wireless drive, there are two indicators. The first indicator is the power indicator and it has five different colors:
- Blue: Battery capacity 90% or above
- Green Battery capacity 50% – 89%
- Orange: Battery capacity 20% – 49%
- Red: Battery capacity 8% – 19%
- Blinking White: Boot-up/USB mode/SD card transfer activity
- Pulsing White: USB mode standby
- Pulses in the color of the correlating charge state: Battery charging
My Passport Wireless has a 3,400mAh built-in battery for portability. On paper (I didn’t really test the battery) it states that it has up to 6 hours of continuous video streaming and up to 20 hours of standby time.
The wireless indicator also has five different colors:
- Blue: Wireless network connected or active (all modes)
- Orange: Wireless network connected to access point (AP) but no Internet connection (shared connection mode)
- Red: Wireless network failed or no network connection (all modes)
- Blinking Blue for a set period (1 minute): WPS initiated and in progress
- Blinking White: Device in use/Firmware update/reset
Ideally, we want to see blue for both indicators.
 - Back")
 - Front")
At the front of the drive, there are two buttons and a USB 3.0 Micro-B Port. The one of the left is the power on/off button while the one on the right is the Wi-Fi Protected Setup (WPS) button.
 - Left")
The built-in SD Card slot is on the left of the drive.
")
Setting Up
Setting up My Passport Wireless is pretty easy and straightforward. After powering on your wireless drive, wait about a minute for it to boot up and once it is booted (blue power indicator light), connect to the wireless SSID “MyPassport” as shown in the screenshot below.

Once that is done, open your browser and navigate to http://mypassport if you are on Windows and http://mypassport.local if you are on Mac.
If you did it correctly, you should see the My Passport Wireless’s license agreement screen in your browser. After clicking “Accept”, you will see the following two screens which basically ask you to secure your My Passport Wireless’s wireless network.


Once you have secured your My Passport Wireless’s wireless network and reconnected, go to http://mypassport (Windows) or http://mypassport.local (Mac) again.
You should see the dashboard below. From the dashboard, you can configure all aspect of your wireless drive.
Dashboard


The Wi-Fi network setting in the Wi-Fi screen allows your My Passport Wireless to connect directly to your router to obtain an Internet connection as well as allowing other computers connected to the same router to be able to access the wireless drive.
My Passport Wireless supports up to eight connected devices and it can share the Internet connection to all the eight devices if the drive itself is being connected to a network that has Internet connection.

The admin screen allows you to change the name of your My Passport Wireless. Do note that once you changed the device name, you can no longer access it via http://mypassport (Windows) or http://mypassport.local (Mac). It has to be the new name.
For example, if I named it LC-MyPassport then I have to access it via http://lc-mypassport (Windows) or http://lc-mypassport.local (Mac).
SSH and FTP access to your My Passport Wireless can also be enabled in the admin screen. Yes, it has SSH support and that opens up a whole new range of possibilities. There is already a GitHub repository on My Passport Wireless Hacks if you are interested in what it can do.


By default, you can access your wireless drive wirelessly (duh) and via a wired USB. However, if for some reasons you want to disable wired access to your wireless drive, you have to turn on Drive Lock. The Drive Lock setting can be found in the hardware screen. When it is turned on, it will just charge when it is plugged into a computer rather than mounting the drive.


You can mount the wireless drive as a shared drive on the Mac like how you would mount a NAS drive.

One of my favourite feature of the My Passport Wireless is the SD card slot which is very useful for backing up photos on your SD card when you are travelling.
By default, the automatic importing of the SD card is turned off. You have to turn on Automatic Import in the media screen.
You have the option of choosing the Automatic Import mode of Copy or Move.
Copy just copies the photos from your SD card to the wireless drive while still keeping the photos on the SD card.
Move on the other hand deletes the photos off your SD card once it has copied the photos to the wireless drive.


Disk Speed test
Because it is a wireless drive (802.11b/g/n) on 2.4GHz band, the network speed is pretty slow. You can judge it for yourself in the screenshots below done using the Blackmagic Disk Speed Test app on Mac.

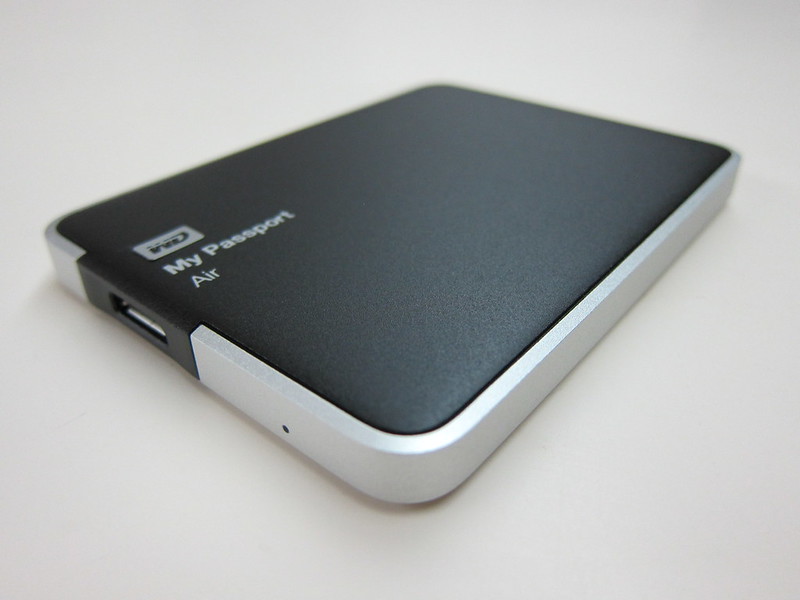
The USB 3.0 on the other hand is pretty decent, in terms of write speed, it is slower than Western Digital My Passport Air but for read speed, it is almost the same.

WD Cloud App
To access content of your My Passport Wireless on your mobile devices, you can use the WD Cloud App which is available on both iOS and Android.
If your mobile device is connected to the My Passport Wireless directly or if the My Passport Wireless is within the same network as your mobile device, the WD Cloud App will be able to detect the My Passport Wireless immediately.


Summary
WD My Passport Wireless is a pretty good device to have for travelling because you can store movies in it so that you can watch it on the plane via your mobile devices. In addition, it can backup your photos stored in your camera’s SD card.
Another useful feature is that it can act as a mobile router for up to eight mobile devices when travelling. This is particularly useful when you have to pay for wi-fi and it doesn’t allow you to connect more than one device to the paid wi-fi hotspot.
Only downside I can think of is that the My Passport Wireless is pricey, 1TB for S$299 and 2TB for S$399.
Pros:
- Easy to setup
- Nice and easy to use web Dashboard
- Built-in SD Card slot
Cons:
- Expensive
- Average disk performance
- No 5.0 GHz support
Hi Lester, Can you advise steps to enable SSH on MyPassport Wireless? I feel like my harddisk is quite exposed without SSH.
The SSH option is one of the option in the Admin menu. The screenshots above are pretty much self explanatory.
ok, thank you. Nice to get a reply from you.