Synology DiskStation DS918+ is Synology’s flagship 4-bay NAS for prosumers and it belongs to the Synology’s Plus Series of NAS.
Announced at Computex 2017 in July 2017 and released in October 2017, it is retailing for S$811 in Singapore at Fuwell.
It cost S$100 more than the Synology DiskStation DS418play and with S$100 more, you get a quad-core 1.5GHz (burstable to 2.3GHz) processor, 4GB RAM, extra eSATA port and the ability to add in two M.2 NVMe SSD for system cache.
In case you are wondering, DS418play belongs to Synology’s Value Series of NAS.
Both the DS918+ and DS418play are powered by the same DiskStation Manager (DSM). So there is no difference regarding software. The only differences are in the hardware as stated above.
Features
DS918+ features an Intel Celeron J3455 64-bit quad-core 1.5GHz CPU (burstable to 2.3 GHz). It comes with 4GB DDR3L RAM with the option to expand it to 8GB (4GB + 4GB).
Similar to DS418play, it comes with two Gigabit Ethernet ports, allowing for link aggregation and failover.
Both DS418play and DS918+ supports up to 48TB (4x 12TB). DS918+ takes a step further by supporting an additional 5-Bay Expansion Unit (DX517) (sold separately) and hence the maximum capacity can be 108TB (9x 12TB).
Unboxing


- 1x DS918+
- 2x Drive Lock Keys
- 1x Packet of Screws
- 1x AC Power Adapter
- 1x AC Power Cord
- 2x RJ-45 LAN Cable
- 1x Quick Installation Guide


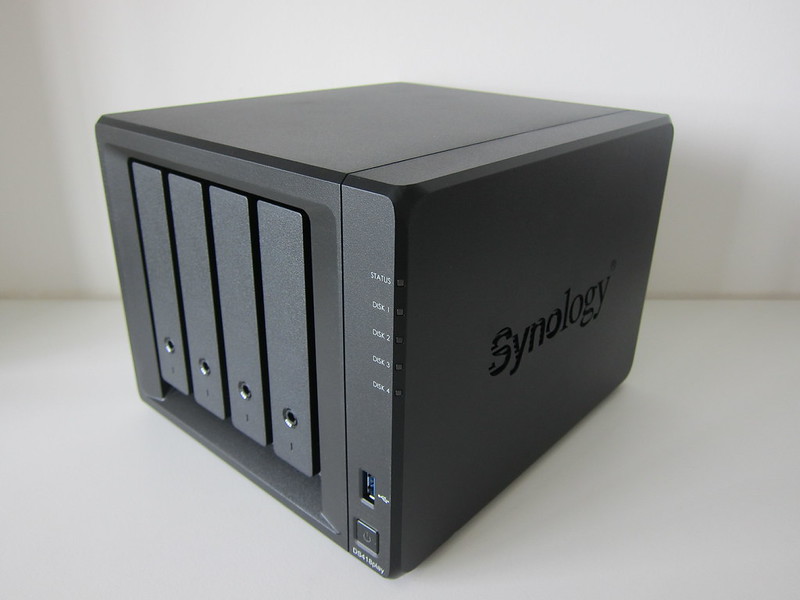
Design
The design of the DS918+ is similar to that of the DS418play. In front of the NAS is the 4-bay drives and at the back is two 92mm x 92mm fans.

There are only two differences between DS918+ and DS418play.
The DS918+ comes with an additional eSATA port in addition to the two USB 3.0 ports (one in front and one at the back).

At the bottom of the DS918+ houses the two M.2 NVMe SSD slots. The DS418play doesn’t have that.

Upgrading RAM
Since the design is similar to the DS418play, the RAM slots of the DS918+ is also located at the same place. It is on the right-hand side of the inside of the DS918+.


DS918+ comes with 4GB of RAM, and you can expand it with another 4GB, making it a total of 8GB of RAM. I got an extra 4GB DDR3L RAM (D3NS1866L-4G) from Synology and expanded my DS918+ to 8GB of RAM.


Adding M.2 NVMe SSD
There are two M.2 NVMe SSD slots at the bottom of DS918+. Adding two M.2 NVMe SSD allows your NAS to have a faster system cache creation which will increase the overall performance.

Samsung has kindly sponsored me two Samsung 960 Evo NVMe M.2 1TB SSD for my DS918+.
Since M.2 NVMe SSDs are still pretty new to the market, there are not cheap. For the Samsung 960 Evo NVMe M.2 SSD, the 250GB retails for S$189, 1TB retails for S$359, and the 2TB retails for S$649.
Migration
Migration between a 2-bay DS216+ to a 4-bay DS918+ is straightforward, and the steps are the same as my migration from DS415play to DS418play.
Since this is an upgrade from 2-bay to 4-bay, you do not need to insert all four hard drives at the same time. You just need the two hard drives from the 2-bay DS216+ first. And similarly, the hard drives must be inserted in the same order.


After you inserted both hard drives, just boot up and proceed on to visit find.synology.com using my browser. The status should show “Migratable,” and just follow the onscreen instructions.


The whole process takes about 15 minutes where a bulk of it goes to downloading and installing the DiskStation Manager update followed by rebooting the DS918+.
After rebooting, you will be redirected to a DSM login page, and that means your migration is successful. You can now insert the two blank hard drives and go to Storage Manager > Volume > Manage > Expand the Volume by adding hard disks.
It will take more than 24 hours to expand your volume.
Configuration the SSD Cache
After installing the M.2 NVMe SSDs, you need to configure it within the DSM.
There are two modes of SSD Cache, read-write cache, and read-only cache.


For the read-write cache, you need two SSDs, and they have to be put in RAID-1 mode. Synology recommends using the same SSDs for both slots for better compatibility and performance.

For the read-only cache, you can just use one SSD.
There is overhead for SSD cache. For every 1GB of SSD cache, it would need 416KB of RAM to process it. And hence, for my 931.51GB (1TB) of SSD, it will require the use of 378.2MB of RAM.


Since I upgraded to 8GB of RAM, this is not an issue. I highly recommend everyone to do the same as well.
It takes about three minutes to create the 1TB of read-write SSD cache.


Benchmark
The benchmarks are done using fio to test how much difference can the SSD read-write cache makes. I have upgraded the RAM from the default 4GB to 8GB, and hence this benchmark is done on 8GB of RAM.
Here is the code that I am running, courtesy of my friend, Andy. It is taken from his Synology DS1817+ Review.
fio --direct=1 --rw=randrw --refill_buffers --norandommap --randrepeat=0 --ioengine=libaio --bs=8k --rwmixread=70 --iodepth=16 --numjobs=10 --runtime=60 --group_reporting --size=1G --name=8k7030test
Similar to Andy, for the reach-write SSD cache, I ran five sets of writing and reading before running the benchmark.
| Specs | Read (MB/s) | Write (MB/s) |
|---|---|---|
| Without SSD Cache | 4.348 | 1.862 |
| Read-write SSD Cache | 90 | 38.535 |
When the read-write SSD cache is enabled, you can notice massive improvements to the read and write speed of the DS918+. Both performances increased by more than 1,900%.
| Specs | Min Read Latency (ms) | Max Read Latency (ms) | Avg Read Latency (ms) |
|---|---|---|---|
| Without SSD Cache | 0.116 | 2,329.1 | 127.623 |
| Read-write SSD Cache | 0.135 | 1,484.3 | 9.514 |
| Specs | Min Write Latency (ms) | Max Write Latency (ms) | Avg Write Latency (ms) |
|---|---|---|---|
| Without SSD Cache | 0.201 | 1,382.7 | 388.785 |
| Read-write SSD Cache | 0.108 | 1,818.4 | 10.649 |
Given that read-write cache is enabled, we expect to see lower latency since reading from a cache is always faster than reading from the hard drives. This is still true as shown in our benchmarks above.
Synology Cloud Station Suite
Synology Cloud Station Suite is a suite consisting of four software, Cloud Station ShareSync, Cloud Station Drive, Cloud Station Server, and DS Cloud.
Think of it as running your Dropbox using your Synology NAS. You store the data remotely on your own NAS, and hence you own the data.
To get started, you need to install Cloud Station Server on your Synology NAS followed by Cloud Station Drive on your computer.

DS Cloud is the app on your mobile devices that are used to access your files stored on Cloud Station Server.
If you are running multiple Synology NAS, you can use the Cloud Station ShareSync to sync files between them.
Cloud Sync
Not to be confused with Cloud Station, Cloud Sync allows you to sync your files in your public cloud to your Synology NAS.
I am using it to backup my files to my Dropbox and OneDrive to my Synology NAS.

Conclusion
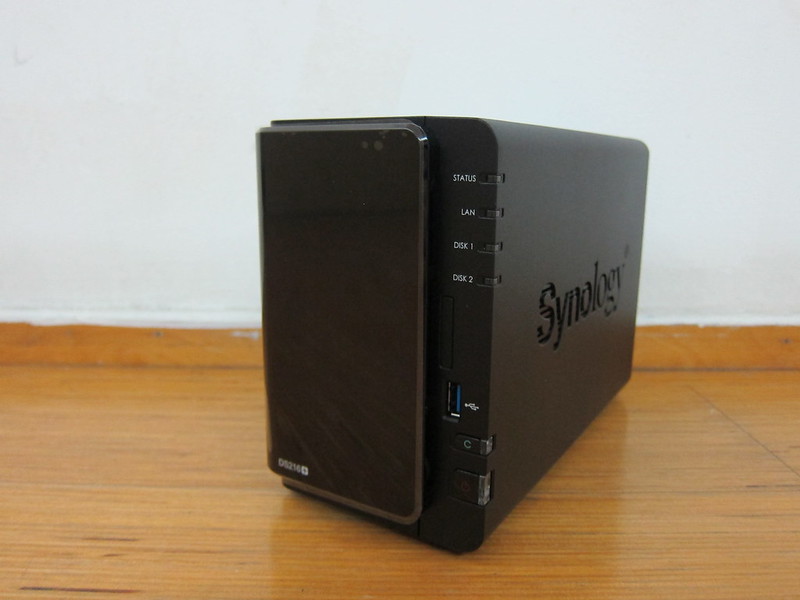
The DS918+ is retailing for S$811 while the DS418play is retailing for S$711. Overall, I find that the DS918+ is more value for money than the DS418play. At S$100, you get a faster processor, more RAM and the ability to use SSD caching which is extremely good for performance.
 with DS418play (Right)")
To some, both might be expensive, but a NAS is worth the investment because you can use it as a media streaming server and a backup server.
If you do not like the idea of public cloud syncing services like Dropbox, you can always roll your own with Synology Cloud Station. You do not need to pay any monthly subscription fee as it is free.
The initial investment of the NAS might be expensive. You need to buy the DS918+ for S$811 and four WD Red 3TB hard drives at S$179 each. The total sum is about S$1,527. But fundamentally, a NAS is like a computer, and it consumes less power than a desktop computer while running 24/7.
What makes Synology stands out among other NAS is the DSM that powers it and the flexibility through its packages. You can set up almost anything on a Synology NAS, ranging from Active Directory Server to Web Server. You can even install third-party packages like Plex on it.


Do you know if the RAID array is expandable across the eSATA port? Or do the disk attached via eSATA have to be in a different RAID array from the internal?
Nope. The RAID is only for internal volumes. If you want to RAID external drives with eSATA, have to buy their official expansion https://www.synology.com/en-global/products/expansion
Assuming you buy their official expansion array, can all the disk be part of the same array or internal and external must be different arrays?
It can be the same.
Sounds good. Been looking at this NAS for a while to replace my old ReadyNAS Ultra 6.
Synology is the best NAS available. Been using it for many years!
I have found it takes the DS918+ about 30 seconds to come back online after disk hibernation. Does having the SSD disk cache shorten that appreciably? (I still want hibernation since there are large time periods when I’m not using it.)
Finally got mine last month! So far it has been great!