The D-Link Omna 180 Cam HD (DSH-C310) was launched in Singapore early this month and is retailing for S$319 in stores and on Apple Singapore Online Store.
The unique selling point of this camera is Apple HomeKit integration. Apple HomeKit is Apple’s proprietary answer to its Smart Home solution.
The camera has no cloud recording. Instead, you can choose to record video clips to a microSD card.
Features
- 180° wide-angle lense
- Full HD 1920×1080 video capture
- Motion detection automatically captures events and sends alerts
- IR LED lets you see up to 16ft (~0.5m) in complete darkness
- Built-in microphone and speaker for two-way audio communication
- Record video clips and images to microSD card for backup
Specifications
- Camera:
- 1/3″ 3 megapixel progressive CMOS sensor
- 16 feet IR illumination distance
- Minimum illumination: 0.3 lux with IR LEDs on
- Built-In Infrared-Cut Removable (ICR) Filter module
- Focal length: 1.72 mm
- Aperture: F2
- Angle of view (16:9): 180° (H), 66° (V), 180° (D)
- Image Features: Image size and quality automatically adjusted based on network connection. Configurable motion detection windows
- Video Compression: Simultaneous H.264/M-JPEG format compression, H.264 SRTP streaming
- Video Resolution: 1920×1080, 1280×720 and 640×360 at up to 30 fps
- Audio: AAC
- Interfaces: Power/Status LED, Reset Button, Micro-USB Power Connector, microSD Card Slot, Microphone & Speaker
- Wireless: 802.11n/g wireless with WPA/WPA2-PSK encryption on 2.4GHz and 5GHz
- Recording: microSD card (up to 128GB)
- Dimensions (L x W x H): 5.8cm x 5.3cm x 13.2cm
- Weight: 232g
- Power (Input): 100 to 240V AC, 50/60 Hz
- Power (Output): 5V DC 2A
Unboxing
The box contents contain only two main items, the camera itself and the micro-USB power adapter. The power adapter can output a maximum of 2A.


Do note that the micro-USB cable is stuck to the power adapter. I always hated this design. I would rather the USB charger and Micro-USB cable come separately.
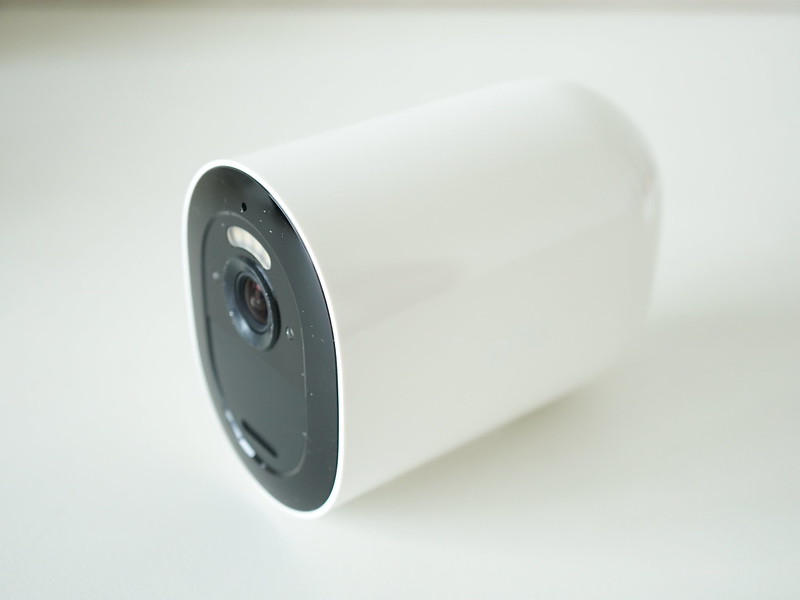
Design
The camera is encased in aluminum housing which makes it looks sleek and premium. It is meant to be placed on a table, and hence the base is stable, and the camera is rather tall (13.2cm).


Because it is in an aluminum housing, the camera gets hot quickly, and it will stay at that temperature. So don’t be alarmed when you handle the camera after some time.
The micro-USB port to power the camera is located at the back while the microSD card slot and reset button are located at the bottom. The camera supports up to 128GB microSD card.


Setup
Since it supports Apple HomeKit, the setup is done using Apple’s Home App, which is preinstalled in iOS since iOS 10.
The setup process is straightforward and intuitive.


Home App
I find the camera features supported in Home App very basic. You basically can’t do anything much besides seeing your camera feed live and doing two-way audio communication.
All the settings of the camera such as motion detection, SD Card recording are all done on the Omna iOS App itself.


By default, you need to be connected to the same wi-fi network as your camera in order to view the feed.
To support remote viewing, you need to have a Home Hub. A Home Hub can be an Apple TV (4th generation) with tvOS 10.1 and later or an iPad with iOS 10.1. Those devices need to be physically in your home for remote viewing to work.
I have an Apple TV (4th generation) at home and I am using that as my Home Hub.

")
The automation portion of the Home App is useless for camera accessories in Apple HomeKit because it is not supported.
Initially, I thought I could activate the camera when I leave home and deactivate it when I arrive home. But sadly, that it is not possible. As Apple HomeKit is a closed ecosystem, you can’t use IFTTT to automate either.
Since the camera is designed to be placed within the house, it doesn’t make sense that you can’t deactivate it when you are physically at home. That is because if you have motion detection turned on, you are going to get spammed with notifications when you walk around the house. I have to deactivate that feature.
Omna iOS App
Since the camera only works with Apple HomeKit, there is no use for an Android App and hence Omna only has an iOS app (duh).
The app reads from your Apple HomeKit data, and hence your home and room name are taken from the Home App when you set them up initially.


With Omna iOS App, you can use it to control the camera settings such as motion detection, SD Card Recording, and updating the camera firmware.
Omna iOS App supports live view and two-way audio communication as well. So if you don’t like to use the Apple Home App, you could use this instead.


I find that the motion detection area is not fine-grain enough. I should be able to draw my own detection area instead of picking the rectangles which are too large. Nest Cam and Beseye Cam allows you to do just that.
Conclusion
Priced at S$319, I find Omna to be slightly expensive given the very limited amount of features at this time. Despite the price, it is extremely easy to set up, and it integrates nicely with Apple HomeKit.
I love the 180° view of the camera. It covers a great area within the house. The quality of the recordings and live view is sharp as you will expect from a full HD camera. I am also impressed with the night vision mode of the camera.
Apple needs to come out with a better solution for remote viewing. Not many people will have an Apple TV (4th Gen) or an iPad permanently at home. If you don’t have both, you essentially can only view the camera feed when you are at home which doesn’t make sense for a security camera.
With Omna, D-Link has made an excellent indoor security camera. But unfortunately, Apple HomeKit integration with camera accessories are still very basic; I hope to see many more features in that area with iOS 11.
The ball is in Apple’s court now.