Bought the Nest Hello Doorbell (Wired) from B&H Photo Video during that Labour Day sale.
The usual retail price is US$229 (S$308), and during the Labour Day sale, it dropped by US$50 to US$179 (S$241). Direct shipping to Singapore is an additional US$21.21 (S$29) via DHL. DHL shipping is swift, I placed an order on 2nd September 2021, and I got it 5 days later on 7th September 2021.
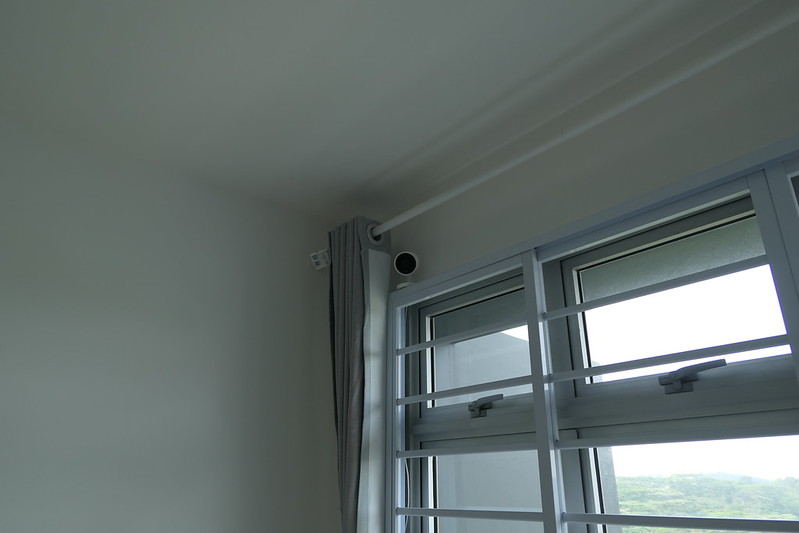
You can install the Nest Hello Doorbell (Wired) on most Housing and Development Board (HDB) Build-To-Order (BTO) flats by yourself without any drilling.
I chose the Nest Doorbell (Wired) instead of the newer Nest Doorbell (Wireless) simply because the newer wireless model doesn’t have 24/7 recording, and I don’t really trust Google’s event video history. I have a Nest Cam that is mounted outdoor and sometimes, it will fail to detect some events.
Unboxing


Specifications
- Dimensions: 11.7 x 4.3 x 2.6 (cm)
- Weight: 122 g
- Power: 16V AC to 24V AC
- Camera: 1/3″, 3-megapixel (2K) color sensor, 8x digital zoom
- Video: HD UXGA 1600 x 1200, up to 30 fps, H.264 encoding, HDR
- Field of View: 160° diagonal
- Audio: High-quality speaker and microphone
- Lights: RGB light ring and status light
- Sensors: Ambient light
- Night Vision: 850 nm infrared LEDs
- Weather Resistance: IPx4 rating
- Wireless: 802.11a/b/g/n/ac (2.4GHz/5GHz) 2×2 MIMO Wi-Fi; WEP, WPA, WPA2 encryption supported, Bluetooth Low Energy, 802.15.4 (2.4GHz)


Tools & Accessories Needed

Here are the tools and accessories needed. I got them from a mix of Shopee and Lazada, and below are the direct links to them.
- Vastar Multi-functional Wire Cable Stripper Stripping Crimping Pliers Electrician Hand Tool (Lazada)
- 120 pcs Electrical Assorted Insulated Wire Cable Terminal Crimp Connector Spade Set Kit (Shopee)
- TB-1503 Dual Row Strip Screw Terminal Block (Shopee)
- Single PVC Blank Plate; 1 gang [WHITE] (Lazada)
- White Wall Plate Compatible with Nest Hello (Shopee)
- AC 230V to 18V 500mA Doorbell Power Supply Adapter Transformer UK Plug (Shopee)
- 1 Gang PVC Surface Box (Lazada)
The 1 Gang PVC Surface Box is not shown in the image above as it comes with the wired doorbell that I bought previously.
Before Installation
I recommend testing both the Doorbell Power Supply Adapter Transformer and Nest Hello Doorbell before installation, so you can ensure that it actually works.


Setup
Since I am powering up the Nest Hello Doorbell, I went ahead and set it up.

When presented with Chime options in the setup process, choose anything as it doesn’t matter since we are not connecting a chime to the Nest Hello Doorbell.

And the setup is done.

Wiring Up Doorbell Point In Kitchen
Most BTOs come with the doorbell point in the kitchen.

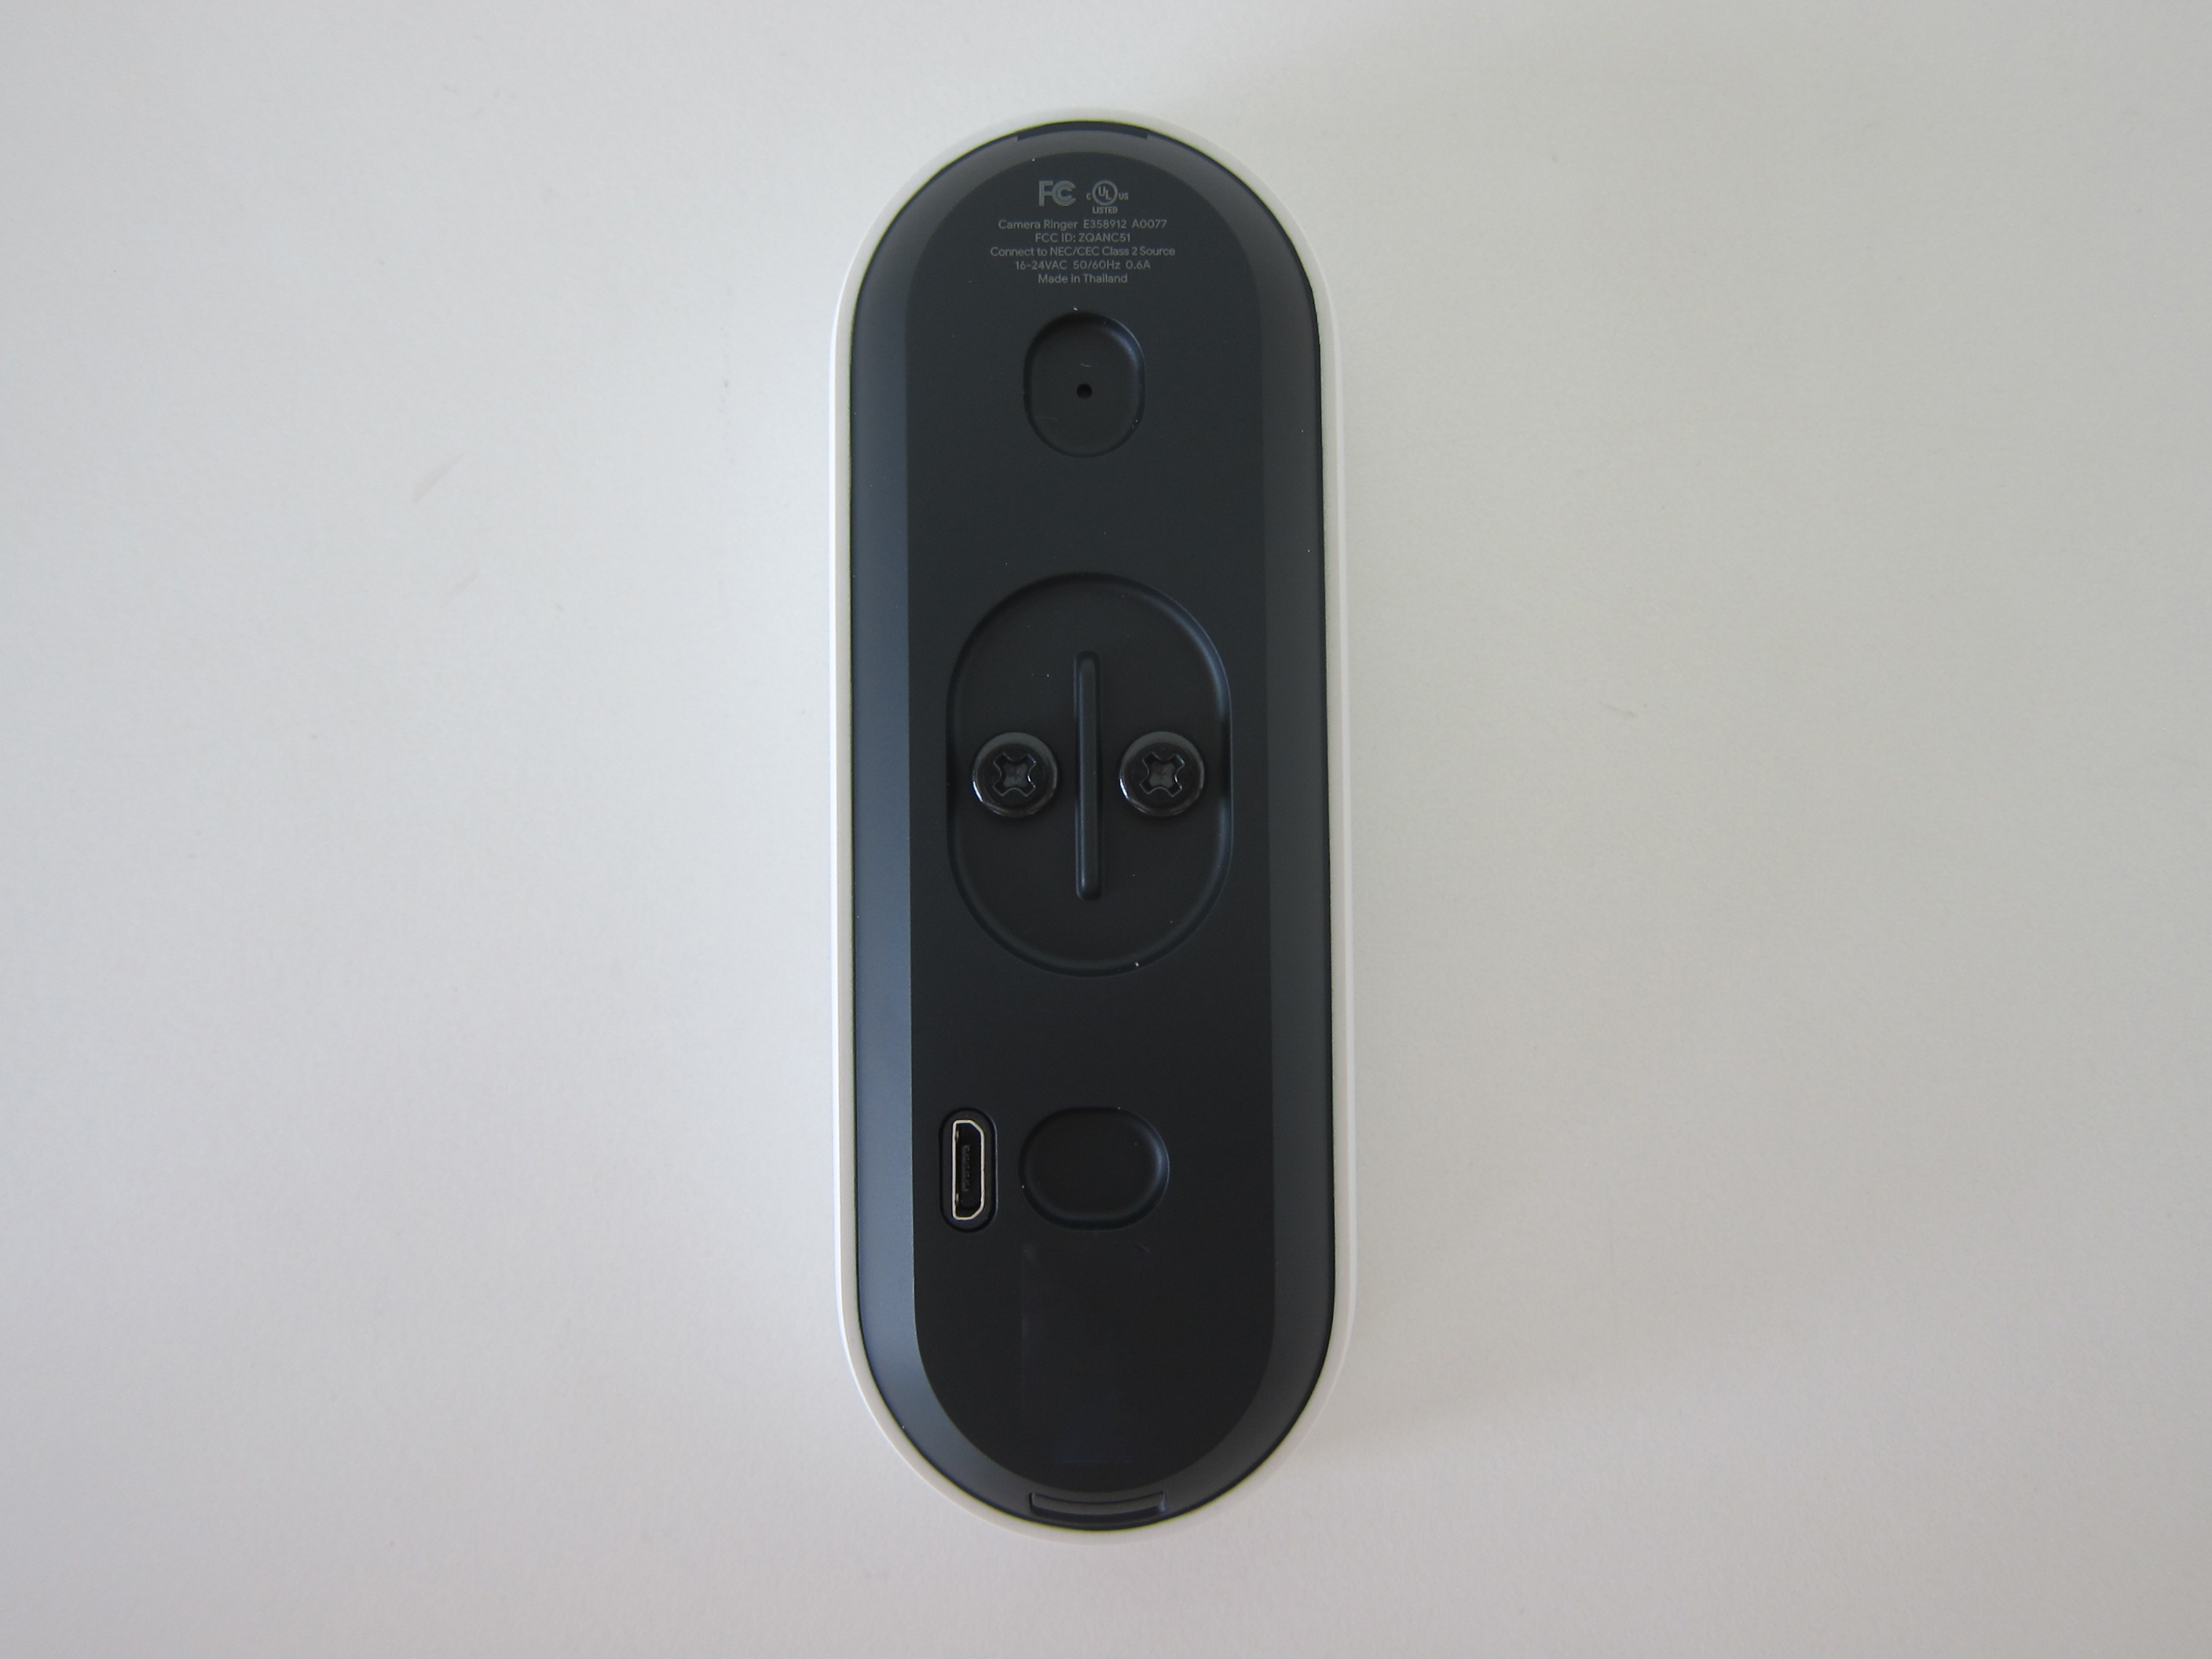
Once you remove the cover, you will see two white wires inside it. Pull it out, and then you can proceed to mount the 1 Gang PVC Surface Box.
Next, you can crimp each of the wires with the ring terminal.

After crimping, connect the two wires to the Terminal Block, and at the opposite end, connect the two wires from the Doorbell Power Supply Adapter Transformer.

Use the PVC Blank Plate to cover the 1 Gang PVC Surface Box, and you can use cable clips to cable manage the wires.

The wire should go through to the top of your bomb shelter so that you can power the Nest Hello Doorbell from the electrical socket in the bomb shelter.
My wire management is not the best, but it is out of sight in the bomb shelter, so I think it is ok for now.

You are done with this step, but do not power it on yet.
Wiring Up Doorbell Point At Your Door
Use a flat-head screwdriver to pry open the doorbell button cover. After that, you can remove the two screws of the doorbell.
Unscrew the screws securing both wires.
Notice that there are four screw holes in the metal junction box? You will use the top and bottom screw to secure the Nest Hello Doorbell wall plates.

The point of the white wall plate is to cover up the huge hole in your doorbell.
Next, crimp both white wires like what you did in the kitchen. Alternatively, you can also use the provided extension wires in the Nest Hello Doorbell box.

After that, screw the wires to the Nest Hello Doorbell’s back and attach the Nest Hello Doorbell back to the wallplate.
Switch on the power in the bomb shelter, and you are done.

Nest Hello Doorbell works well for me. After pressing the Nest Hello Doorbell button, it takes between 3 to 5 seconds for the in-app notification to show along with the visitor announcement on your Google Home.


*UPDATE* 22nd September 2021, My Nest Hello Doorbell (Wired) Is Bricked